Balancing our efforts in ‘stepping forward’ and ‘staying back’
Do you talk more than you listen? OR Listen more than you speak?
Can you pause before you react or do you react before you think?
Can you see these metaphors in the lunge pose? I sure do!
How is your lunge pose? How are your hips??
The Lunge is a foundational and functional posture that will keep your hips mobile and functioning as you age.
Did you know that practicing the lunge pose can help you build strength and encourage more space in your lower body including your hips/pelvic floor/low power house muscles?
When practicing this posture it is good to pay attention and notice if you are able to…
1 – distribute weight evenly between your front and back foot?
2 – feel supported and grounded. Is your base of support wide enough?
3 – integrate your feet to feed your thighs into your hips?
4 – square your hips and hug your midline?
5 – lift and lengthen your spine out of your hips/pelvis?
As you practice your lunges – Do you tend to step forward or step back and why?
You do not need to tuck your tailbone in order to strengthen your core!
Joseph Pilates placed a strong value on understanding and connecting to a TALL back in standing exercises to help one understand proper posture. Having awareness of a TALL back posture is essential before going into any movement and especially into a round back(tucking) posture.
*in fact, it was quite common for Joe Pilates to have his clients “stand” for their whole lesson. He would encourage them to focus on their posture. When their posture was ‘good enough,’ Joe would invite them to progress with the apparatus and other exercises.
Whenever you are standing, you want to connect to a TALL back posture. A tall back is when you –
Respect the natural curves of your back. Lordotic curve in lumbar and cervical spine and kyphotic curve in thoracic spine.
Connect to a neutral pelvis(aka – not tucked) When your pubic bone is level to your hip bones on the sagittal plane.
You stack your body! Where the center of your skull lines up to the center of your ribs, lines up to the center of your pelvis, lines up to the center of your knees and finally ankles.
Posture is an action and never just ‘sits’. Meaning that, you need to be attentive and present to sustain a tall back posture:). Its takes steady presence, effort and sometimes some softening to find and maintain a well balanced posture. For me personally, I have a very flat back and my head pushed forward and down for many reasons!!. Knowing this, I focus on lifting my low back in and up, I also try to create more width and expansion in my mid thoracic spine by using my breath, and I have learned over may years to pull my throat, skull back and up which has helped me not only achieve better alignment, but consequently allowed me to build better strength in my upper back and neck.
*Most people (I observe) have super tight hip flexors (maybe from too much sitting or too much exercising and not enough stretching). Tight hip flexors will push their thigh bones forward in their hip sockets. If this is you, you’ll need to soften your knees, to draw the top of your shins forward to help you draw the top of your thighs back! Another common issue is rib flaring in the front body. To help with your ribs you need to consider expanding and breathing more into the back of your rib cage and use your exhales to connect the front ribs in and down toward the pelvis to expand the back ribs back and up.
What are you working on in your posture?
If you practice Yoga, you can think of Tadasana/mountain pose as your TALL back posture! This posture is not just ‘standing there’… On the contrary, Mountain pose in yoga is a demanding, dynamic standing posture. Although you may look still on the outside you are working hard on the inside to oragnize your body as you integrate every part of your body from your feet pushing into the earth to ground, all the way up to the crown of your head. You should feel strong and stable like a mountain, yet also light and lifted like a puffy cloud. In other words, no one would be able to come by and push you down because you are strongly rooted, buoyant and resilient connected bottom to top, top to bottom, and side to side!
Are you attentive when you stand still?
So why then do we tuck the tail bone…
In round back positions and rolling position we need to tuck the tail to help us with articulating our back bone by bone. Think of rolling-over, rolling like a ball, open leg rocker, seal on the mat or stomach massage round back, elephant, and kneeling knee stretch with a round back position on the reformer.
There are some exercises that transition in and out of round back such as the roll-up on the mat and the short spine on the reformer. When lying flat on the mat you should aim at having a neutral pelvis and when you are up in your c-curve you should have a round back where you stay slightly behind your sit bones as you roll -up. This is a subtle yet powerful awareness to build as you progress in your practice!
When we are rounding our back and our tail bone is tucked we also want to be sure our whole spine is in a c-curve so our spine is in harmony and not performing 2 separate opposing actions! Therefore, our chin should be at our chest and our gaze at our abdominals/ribs pulling and sternum pulling back and up to expand and broaden the upper spine to the lower spine. If you practice yoga, you should think Cat back not Cow back!
*I find many, including myself, have a difficult time rounding without collapsing. It is essential to keep your inner lift!
Although there are more spinal shapes (twist/side bend), the tall and round back are the 2 spinal shapes we use in the sagittal plane.
The round back is useful to teach us how to connect more deeply, to our whole spine. As a reminder when strengthening our center it involves our whole spinal body as one part will affect the other part! That is Pilates…everything is connected! Be patient and use your breathing as your guide and tool to create more width and space where your body needs it. That said when we round our back, we want to try to pull in our front body and our side bodies to support and expand our whole back side. When transitioning back to a TALL back posture (as we do several times in our pilates workouts)we should try to keep that “connection and fullness” in our back, as we reconnect to our Tall back posture.
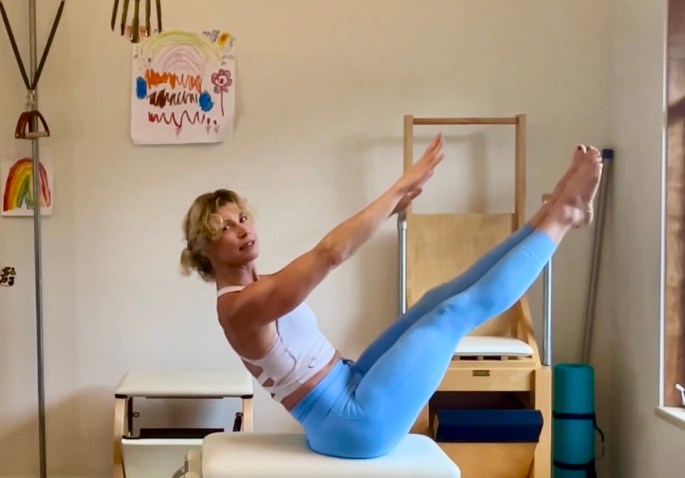
How about the teaser?
The teaser exercise is a strong and very challenging pilates exercise. Although this exercise requires a whole lot of BALANCED core strength, it also is essential that you have a flexible spine and open hips! There is a lot going on in this exercise, and it is not for everyone, especially if you have a boney tailbone…
For me personally, I have a very stiff low back and rolling up and down is tricky for me. If I move too fast, I will miss my whole lumbar spine on the way up and down. I have learned to slow down to feel more and take my time. Using my exhale will also help me cinch my waist more to help me better articulate.
This is just one scenario…There are many scenarios!! Whatever your issue/issues are – please remember it is not the destination of ‘sticking’ the posture or finding perfection – rather, it is the journey and process in how you work with your body with accepting what is first…there will always be another issue and always more work to do. Listening and paying attention to what is and making honest adjustments to support ourselves is always the best way forward…
Teaser. – Tall back or round back position?
Its actually both! There needs to be lift and length so when in your teaser position you are not dumping and collapsing in your lumbar and thoracic spine. That said there is a subtle c-curve. Meaning you will be behind your sit bones with the low back slightly rounded to support a posterior tilt especially if you are going to articulate your spine.
Careful that you are not collapsing in your lumbar spine… For example, if you are rounding too much in your low back, most cases you will be too round in your upper back and therefore not able to find your lift and length in your tall back and be able to widen your collar bone and open your chest! On the flip side, if you have too much extension and perhaps are positioned in front of your sits bones, most cases your ribs/chest will be pushing forward too much and you will not be able to connect well to your subtle c-curve and your power house muscles.
The bottom line is that there is always an element of TALL back. It is essential that you find your tall back first, especially before you round.
AND…
Remember to be gentle and patient with yourself! Pilates is not as easy as most people think. It’s sweaty hard work and always involves the WHOLE BODY. The practice of Pilates requires one to stay present and give a lot of effort! This attentiveness and hard work will increase your strength and overall well being. Any successful practice is generative:)
We get good at what we practice, not what we know:)
Check out my latest teaser tutorials on my YouTube channel!
I believe that we are as strong in our core as much as we are open in our hips. To find a beautiful posture and superior balance in our bodies, we need both. For, if our hips are stuck tight and bound with no space we will not be able to access and use our strength in our daily functional movements.
2 tools to help you unwind tension in your hips is the hip hinge and finding a neutral pelvis.
When you perform a hip hinge -notice if your back rounds and bends when you hinge. You should instead aim to keep your back long and lifted. It seems simple to hinge the hips but our hips can hold a lot of tension and sometimes this simple exercise is harder that you may think.
A neutral pelvis is a position where the pelvis is neither too arched, nor too tucked. For me I sense balance on all my sides of my pelvis and one side is not working more than the other.
Understanding and executing these 2 actions in our movements will encourage more space and balance in our hips and will help us engage the bottom of our lower powerhouse (aka pelvic floor muscles) that are easily neglected in today’s modern world of sitting too much.
One scenario of why you may experience a lot of muscular tension in your hips and groin area is possibly because your thigh bones live more forward toward your quadriceps, instead of back toward your hamstrings. If this is your reality, welcome to the club! This is not uncommon. Being more quadricep dominant, usually indicates imbalanced pelvic floor muscles, and weaker hamstrings and gluteal muscles. When there is an imbalance between front and back bodies, poor balance, especially on one leg is usually a consequence. Poor balance happens when you are not able to integrate your body as a whole and connect to your midline. You may still have lots of strength but it is not balanced in your body side to side, front to back, and upper to lower body through your pelvic center!
To work on opening your hips to connect your upper and lower bodies better and enhance your balance, I recommend practicing your hip hinge, as well as being mindful to connect to a neutral pelvis!
As you hinge in your hips you can concentrate on drawing the root of your thigh bones back into the back of your hip socket. When you do that you should feel your quadriceps soften and find more connection of your gluteals and hamstring muscles. Maintaining a neutral pelvis where you are not tucking nor arching can help you integrate your whole body as one piece and feel connected on all your sides. Notice when you stand….do you feel more quadriceps or more hamstrings? Can you stand and notice both sides?
I have made a short video on my YOUtube channel to help you unlock your hips, (especially if you are, one of the many, who live more in your quadriceps than your hamstrings)! I demonstrate a hip hinge lying supine, and show you what to watch out for when sustaining a neutral pelvis! I hope this will be useful for you.
The 3 stretches I demonstrate are called, reclined hand to big toe pose – Supta padangustasana 1,2,3
These 3 stretches, done with neutral pelvis, release the muscles surrounding your pelvis to unlock your hips and therefore create better balance!
Once you think you found a neutral pelvis, its’ interesting what happens when you move. remember the pelvis is connected to your lower and upper body , so it is easily pulled around all day!
It takes time and patience to notice your pelvic tendencies. Not an easy thing to do if you are always in a hurry.:)
Finding neutral in my pelvis still a mindful practice for me. Neutral pelvis serves me well in all my activities. I feel grounded and integrated head to toe and more connected and balanced front to back and side to side.
A ‘mother tucker’ is someone who is stuck in a ‘tucked’ position.
-Brooke Oberg
Yes! I was a “mother tucker” for many years and still do catch myself tucking when it is not appropriate! If you have read any of my previous posts you already know this and probably have a good idea why too.:)
Not to say that ALL tucking is bad. In fact, some exercises you need to tuck to support the round back position. However, its important that when you do ‘tuck’ you are aware of how it is affecting your sacrum.
Our sacrum is a vulnerable area in our body and it’s worth our efforts to pay attention to how we integrate this area in our movements so that we can find more optimal alignment patterns and feel more freedom and move with more ease in our whole body. Remember its not all about what we do, instead its important HOW we do it and how we are incorporating our ‘whole body’ in our actions!
I hope the following will bring more awareness to your sacrum. I hope this awareness will convey how sacred our sacrum is and helps us consider how we manipulate this area in our body.
The sacrum in human anatomy is a large triangular bone at the base of the spine. It is situated at the upper back part of the pelvis, and connects our 2 pelvic halves(hips). The upper part of our sacrum connects to our lumbar spine and the base of our sacrum connects to the tailbone/(coccyx). Thus the sacrum connects the upper and lower body(heaven and earth); all our bodies weight pass through this location. Lastly, it is a concave shape as it is curved upon itself and the base of the sacrum, the broadest and uppermost part, is tilted forward. Meaning for optimal standing and seated posture, the low back/sacrum should be in extension – ‘in and up’ as opposed to being stuck in a tucked position.
Some other interesting things about the sacrum…
-The Romans said this part of the body was “sacred” or “holy” as it was used in sacrificial rites in protecting the genitalia (which in ancient times were considered sacred). In yogic spiritual anatomy, the sacrum is the home of Kundalini, a feminine – serphant like energy that sits coiled at the base of the spine.
-The sacrum is known to be the keystone of our pelvic bowl! It is in the sacrum, where life is created, just think about that!! Also, many of our vital spinal nerves start in the sacrum and the sacrum is one end of our nervous system that connects all the way up to our brain via the Vagus Nerve.
-Too add to this complex area, the sacrum is the location of 1 of our 7 energy centers of our body (svadhisthana chakra). This location of our sacrum governs our sensuality, sexual intimacy, our ability to give and receive pleasure, and simply be creative and in the ‘flow’ of our own life. When this area of our body is blocked or stuck for any reason, perhaps being to sedentary, injured, feeling not safe, etc, or in perhaps tucking too much….it can create many imbalances, upset our ability to connect to our parasympathetic nervous system, and create feelings of isolation, low libido, and detachment.
Now that we have more knowledge of the sacrum:
When do we tuck?
As I mentioned earlier, tucking is inappropriate and unnecessary most of the time unless you are integrating your whole spine and posture into the tuck; aka, round position ….think rollup, rolling like a ball, etc. Or perhaps you are mobilizing, creating length and space for your lower back with cat/cows or rolling bridges. With more fluid mobilizing movements such as cat/cow, remember that you are not holding the tuck for very long.
How to integrate the sacrum so it stays open and spacious in the tuck?
Tucking is useful to do in an effort to stretch and open our low back. However, with everything, it is easy to overdo the tuck and instead of creating more width and space, its easy to clench our low back/buttocks instead. In order to keep the sacrum spacious it is necessary to check in with your low back and notice your sensations. Here are some tips to help you with your tuck:
1 – when you are tucking and your low back in rounding, your whole spine needs to be in the round back position!! That means you are looking at your abdominals with your eyes and your scapula is brooding wide across your back and the back ribs are also fanning open to create space for your front spine and abdominals to deepen into.
2 – root your femur bones (thigh bones).
If our thigh bones are stuck forward this can pull on our low back muscles making it easier to collapse and yes – tuck! How to check if your things bones are forward – feel your groins if they are hard, usually your femurs are too far forward and you need to integrate some hip stretches that open up the back of your hip capsule so your femurs can glide back in the socket. Other times, you just need to check in with your lower body – if your knees hyperextend when you are standing, you are most likely a tucker. My advice for you is to soften your knees, ground and spread your feet wide in an even portion and stack your posture more appropriately. Think – center of ankle below center of knees, below center of pelvic bowl, keeping your knees soft of course!!
3 – energize your lower body. Remember your legs/feet are an extension of your powerhouse core, hip/pelvis/sacrum center. So its valuable to integrate these parts with full awareness in your movements. Careful not to let your limbs just hang and be an ornament…you want your limbs participating as much as your core. To do this, you need to hug your midline or energetically draw your shin bones in and your thigh bones apart to energetically open up your sacrum low back.. think of a see saw, lower limbs hug in to your middle to simultaneously broaden and open your upper thighs hips/low back.
The bottom line is that it is a good idea to pay attention to your posture and how it is affecting your sacrum and vice versa. When standing, sitting, and exercising etc, check in with yourself. Most of the time, you will want to keep your low back long, lifted and spacious in its’ lumbar/natural lordotic curve, which is essential to balance your spine and posture. When you need to tuck, remember that 1 – the whole body needs to be participating from your feet to your skull in your round, 2 – Energize your lower body by hugging your midline, and 3 – root your femurs bones! When in doubt, know that you never want the low back bones to push out and back in collapse! This happens all too easily in a tucked position. This congestion in our low back hips creates pressure and feelings of stickiness in our pelvis/hips/low back.
I hope reading this helped bring more awareness to your sacred bone, sacrum. Its a vulnerable area in our body that is easily neglected. Try to recognize this sacred bone, the sacrum. Maybe, also take a moment to reflect on the people and things in your life that are sacred to you. The things and people that usually matter most to us can also be neglected and taken forgranted. Bringing our attention to the sacred within and around us will hopefully uplift us and help create more inner lift and peace.
I have posted some recent videos on my you tube channel that are a good complement to this idea.